Monday, March 28, 2016

Her Solo - Part 1

I started a new project. No, I haven't finished my husband's RotJ Luke, but that kind of seems pointless until he gets the right lightsaber. *sigh* I'm not going to let that stop me from moving forward with my custom just-for-fun not-even-going-to-try-for-approval smuggler. Honestly, I didn't even know that trying for Han approval as a woman was even an option before yesterday. (Check out this amazing sauce Female ESB Han Solo WIP.)


Shirt

It took months of searching for an acceptable shirt. By the time I discovered this one, it was being discontinued. I had to drive 45 minutes to get to a Target that had one in stock. On-line ordering was not offered as an option. *face-palm* But I managed to get one and I love it. Happy costumer!

Women's Convertible Sleeve Tunic White - Mossimo

Pants

I wasn't worried about authenticity so I didn't do the blood stripes the right way (sew the pants myself and have my mom stitch out stripes on a separate piece of matching fabric on her embroidery machine.) and didn't want to color match a separate strip of fabric or draft my own pants, so I used my regular sewing machine to do a close enough job on these pants.

The Long Pixie Pants

This is how I did the blood stripes (the best part--so far--of this whole costume):
  1. Ripped out the inseam of pants
  2. Basted a rectangle on the out seam to mark where I wanted the stripes to be
  3. Set my machine for a wide satin stitch
  4. Threaded top thread with Mulled Wine Hemingworth PolySelect machine embroidery thread and bobbin with bobbin thread (Yes, bobbin thread is an actual type of thread used for embroidery.)
  5. Spent two days measuring, marking and stitching
  6. Removed basting stitches
And voilĂ ! Embroidered blood stripe pants.

Belt

It looks like the belt I bought has been discontinued. Sadness. I bought it from Forever 21. It is the Faux Leather Perforated Belt. Technically it does have three holes and two belt prongs like Solo's. Close enough costume pieces for the win!

Faux Leather Perforated Belt (discontinued)

Boots

Sonja Henie's Tutu. I thought that boots wouldn't be that bad for this one since I'm not trying to conform to any standard. Enter the curse of the wide feet with normal size calves. After purchasing and returning two pair, I got these. I bought 9.5W (full size larger than what I normally wear) in dark brown from Amazon. With thick hiking socks and insoles they are pretty comfy. A must for wearing all day at conventions. I even wore them all day at Disneyland! Sure my feet hurt at the end of the day, but I made it. :)

LifeStride Women's Winner Riding Boot

Necklace

This is detail is just for fun. (Yeah, like the rest of this costume.) Love it! Besides, what kind of Corellian Jedi smuggler would I be if I didn't have a YT-1300? 

Star Wars Millenium Falcon 3D Mold Necklace

Sorry you can't see the necklace in the picture. It's kind of hidden behind my phone. :/ I'll be sure to get some good pics once the costume is done. 

All that is left is the holster rig and blaster. Yeah... cake walk.

Friday, August 28, 2015

RotJ Luke - Progress Report

Okay, here is my checklist from the Rebel Legion costume standards page for this costume. I'm planning on updating this page as I go along. Wish me luck!

REQUIRED ITEMS

  1. Black long-sleeve shirt w/mandarin-type collar, with fold-over bib (w/exposeable section by right shoulder with light grey lining).
  2. Black flat front tight-fitting pants with a zipper and fly and black “tuxedo” trim on the side seams.
  3. Black leather belt with silver weathered octagonal buckle w/small back pouch.
  4. Black equestrian-type knee-high boots.
  5. Luke’s ROTJ hero lightsaber hilt.
  6. Black leather wrist length right glove.
  7. Characters’ hair needs to be a “similar” style to that of Luke Skywalkers’- no buzz cuts or beards also.

RotJ Luke - Fabrics

This costume is basically a whole lot of black on black with a little gray accent. The black is soft and somewhat thick with a soft hand. The gray is hardy, but seems like it will wrinkle easily. I will definitely be interfacing it.

Black Suiting
Self - Black Suiting
Executive Suiting
Color: Caviar
Width: 58 inches
Content: 100% polyester
Care: Machine wash gentle cold, non-chlorine bleach, tumble dry low, cool iron


Gray Twill
Accent - Gray Twill
Famous Maker Solid Stretch Twill
Color: Caviar
Width: 58 inches
Content: 65% cotton, 32% polyester, 3% spandex
Care: Machine wash gentle cold, non-chlorine bleach, line dry, cool iron

RotJ Luke

So I made my Formal Jedi (love it!), but Dash doesn't have anything to wear that compliments it. He likes Han Solo (who can blame him), but there is nothing formal about the roguish smuggler. I considered a black Imperial officer uniform with a Victorian bent, but I couldn't resolve the idea of an Imperial officer taking a Jedi to a party as his plus one. Finally inspiration struck. George resolved my problem for me thirty-two years ago when Luke Skywalker's costume design for Return of the Jedi was based on the Imperial uniform. Eureka.

And so I have resolved to make a Return of the Jedi Luke Skywalker costume for Dash. Rebel Legion costume standard here.


We already got the boots from Todd's Costumes. They were a bit pricey, but I love them. They are gorgeous and are actually tall enough for Dash's legs. They come all the way up to his knees. A miracle in and of itself.


Mara - Finished

So obviously I failed in documenting every step of this process, so feel free to contact me if you have any questions.

Here are my submission photos. The lighting and focus is a bit off, but my photographer was six years old, so I really can't complain. I was Rebel Legion approved in January 2015.


Dash - Finished

Here he is all finished. Only took a year. And can I just say for the record that I hate cotton gauze. It has the right texture but stretches like no other. I'm never sewing with it again! But he is happy. :)


Formal Jedi Concert Dress

I called this one the Jedi Concert Dress or John Williams Dress. I have a friend who looked it up and down and said, "Formal Jedi." I loved that.

The underdress is bleached premium muslin. It features a fitted bodice and full length skirt with tiers of ruffles. (Thank goodness for ruffler feet.) I cut the fabric strips for the ruffles on the bias so that I wouldn't have to hem them. It is awesomesauce. (In case you are wondering, there is a petticoat under there leftover from my wedding.)

The overdress is gray heather suiting from JoAnn. It is the same fabric I used for my Jedi tunic, just in a different color. I love this material! Though one does have to overcast the edges of every piece after cutting before sewing them together. Small price to pay. The bodice crosses in the front like a typical Jedi tunic. I made the sleeves extra long and wide to add more drama. The waist band is interfaced and closes with snaps. The skirt is mostly straight in the front with some gathers in the back. It opens in the front to show off the tiers of ruffles on the underdress. A clip was sewn into the waistband for attaching my lightsaber.

I designed it in my head a year ago when I found out that the local symphony was going to be performing a Star Wars concert featuring the music of John Williams. The goal was to make a Victorian/Jedi crossover. I'm super happy with how it turned out. It is so fun to wear; and, more than anything, it came out looking just like I pictured. :D


Tuesday, August 5, 2014

Dash - Fabrics

And finally, Dash's fabrics. He actually came to the store with me and picked out his own fabrics (with some guidance). The "fabric swatches" are copied from the websites. The colors actually don't look like these in real life, but they are an approximation. For instance, the charcoal knit is lighter and the natural cotton gauze is more yellow. They need better photographs.

Sew Classic Knits Ponte Roma Solid Fabric

Color: Charcoal
Width: 58 inches
Content: 58% polyester, 40% rayon
Care: Machine wash cool delicate, No chlorine bleach, Tumble dry low, Cool iron
Source: JoAnn (link)

Use: Inner tunic


Sew Classics Shirting Stretch Poplin

Color: Cornstalk
Width: 50 inches
Content: 97% cotton, 3% spandex
Care: Machine wash cool delicate, No chlorine bleach, Line dry
Source: JoAnn (link)

Use: Lining


Sew Classic Specialty Cotton Gauze

Color: Natural
Width: 44 inches
Content: 100% cotton
Care: Machine wash cool delicate, No chlorine bleach or Fabric softener, Tumble dry low, Cool iron
Source: JoAnn (link)

Use: Outer tunic, tabards, obi


Sew Classic Hopsack Linen

Color: Potting Soil
Width: 52 inches
Content: 55% linen, 45% rayon
Care: Machine wash cool delicate, No chlorine bleach or Fabric softener, Tumble dry low, Cool iron
Source: JoAnn (link)

Use: Robe

Monday, August 4, 2014

Mara - Fabrics

With Arix's costume done, I purchased fabrics for mine and Dash's costumes. Woo-hoo. I will but putting his fabrics in a separate post.

Sew Classic Knits Reverse Heathered Knit

Color: Ivory
Width: 56 inches
Content: 70% rayon, 28% polyester, 2% spandex
Care: Machine wash cool delicate, No chlorine bleach, Line dry
Source: JoAnn (link)

Use: Inner tunic


Sew Classics Shirting Stretch Poplin

Color: Potting Soil
Width: 50 inches
Content: 97% cotton, 3% spandex
Care: Machine wash cool delicate, No chlorine bleach, Line dry
Source: JoAnn (link)

Use: Lining


Sew Classics Suitings Fabric

Color: Brown Heather
Width: 57 inches
Content: 100% polyester
Care: Machine wash cool delicate, No chlorine bleach or Fabric softener, Tumble dry low, Cool iron
Source: JoAnn (link)

Use: Outer tunic, tabards, obi


Sew Classic Amaretto Linen Look Solid Fabric

Color: Black
Width: 54 inches
Content: 50% polyester, 50% rayon
Care: Machine wash cold delicate, No chlorine bleach, Tumble dry low, Remove promptly
Source: JoAnn (link)

Use: Robe

Monday, July 28, 2014

Mara - Boots

On Saturday I went to my local thrift store, looking for buckles for Jedi belts. As I was pursuing the racks of shoes and purses looking for interesting buckles, I spied a pair of rich dark brown leather boots with a low heel, round toe, and inside zipper. They looked like they had been worn only once or twice.

I got over my surprise at finding such a quality item and tried them on. Surprise turned to shock when they actually fit! My shoe size is 8 1/2 WIDE. Do you have any idea how hard it is to find cute shoes in a wide width? Especially when one believes that her shoes should look like this:


But I digress. I found these boots. They were $16.26. I bought them. I have Jedi boots. Done.


(I think I am going to find some skinny pants to wear with my costume and attach stirrups to the cuffs to keep them smooth. I hate it when my pants bunch up around the top of my shoes.)

Saturday, July 26, 2014

Arix - Pants & Tunic

Here is the start of Arix's costume. His pants are the same as Jax's pants. They are just 1 1/2" shorter and I did better about making the elastic more snug. I love this weavers cloth. It looks so nice. It also feels pretty sturdy. I'm thinking of using it for something for myself one day. I have no idea what, but something. The inner tunic is a brown T-shirt he loves and has had for a long time.


The outer tunic is also much like Jax's tunic. I shortened the pattern in the shoulder, waist and side seams and redrew it. I left the sleeves the same. Jedi sleeves are pretty generous (and I didn't want to try redrawing those curves). I think they look really good.

I tried it without the side slits. Not only was it difficult for Arix to walk and sit, but also it was harder for him to get it on and off! I ripped out the side seams up to three inches below the waist line (about the top of his hip) and put in slits. Problem solved.

These pictures were taken during his one and only fitting, so the edges were not hemmed and the snap on the front was not sewn on. So you will just have to trust me when I say that they are hemmed now and the front of the tunic snaps shut. He looks great in it. :)


The only big difference between Jax's tunic and Arix's tunic is this one is fully lined since the papyrus cotton gauze is so light. I didn't want the brown T-shirt showing through. It is also good practice for mine and Dash's tunics since they will most likely be lined. I think it looks really nice and I am rather proud of it.

What I learned:
  1. Fully lined tunics look awesome.
  2. Side slits are essential for pull-over type tunics. 

Friday, July 25, 2014

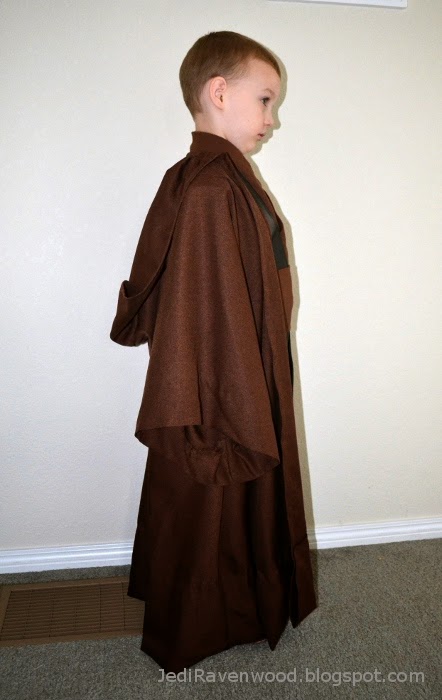
Jax - Robe

Behold! Jax's robe! (Imagine fanfare here.)


For the most part I followed SithariRog's robe tutorial. I only messed up in a few ways, but we will get to that later.

I realized that the sleeves were short enough that I could cut the robe main body as one piece by folding the fabric in quarters. I did this (more on that later) and I basically had a Jedi robe shaped poncho that needed side seams.


I stitched up the sides with French seams. It looks nicer and the material I chose really likes to shred at the edges. French seams = no loose threads to cut off in the future.

Next I cut the hood. (It is too big. I need to find a good hood-to-body ratio.) In the tutorial it says to pleat the hood and robe. I'm all for pleats, but it was late and I was being impatient so I gathered the bottom edge of the hood and sewed it to the neck of the robe body.


I sewed a strip of fabric over the main body/hood seam to cover the raw edges as recommended in the tutorials. I don't think I did it quite right, probably because I did it all on my machine. No hand stitching. I'm going to have to think on this and research some more before trying it again.

Remember how the robe was like one big poncho? At this point I cut open the front of the robe. I used a 1/2" rolled hem to finish the front edge. I did it all in one seam--up the front on one side, around the hood, and down the front on the other side. Clean. Neat. Done.

I had lots of material left over for the hems on the bottom edge and the sleeves. I decided to leave the excess material to let the robe out as Jax grows, instead of cutting it. Cutting would have been easier with those A-line curves, but it is done now and it's great.


A quick word on the hems for the sleeves and bottom edge. Please, for the love of all that it good and beautiful in this world, use a blind hem stitch for hems on curves. It really isn't that hard once you know how to do it. Look it up on YouTube. Having a blind hem foot for your machine makes it just that much easier.

Now it is later. I realized that the sleeves were short enough that I could cut the robe main body as one piece by folding the fabric in quarters. That wasn't the problem. I didn't move my fold so as to leave the most amount of excess at the bottom of the material. It was late and I was not being patient. My bad. This was all fine and well for the body, but left me insufficient material for the hood. (Face palm.)

I ended up sewing two rectangles together to make a large enough piece for the hood. If I had just moved the main body pattern and the fold up instead of cutting from the exact center of the fabric, it would not have been a problem and I could have sewed the hood from one, beautiful, uninterrupted piece of fabric. Live and learn. Live and learn.

What I learned:
  1. Cut from the edge of the fabric, no matter how much easier it is to cut from the middle.
  2. I need to learn how to cover the main body/hood seam and make it look good on the outside of the robe.
  3. Find some equations or something to get the sizing right--particularly of the hood.

Thursday, July 24, 2014

Arix - Fabrics

With Jax's costume in a good place (I'm going to get to belts and shoes later), I am turning my attention to Arix's costume. These are the fabrics that I bought. I may track down brown pleather for a belt and shoe covers, and fabric for a robe later. Today is not that day.

Sew Classic Specialty Cotton Gauze Fabric Solid

Color: Papyrus
Width: 44 inches
Content: 100% cotton
Care: Machine wash cool delicate, No chlorine bleach or Fabric softener, Tumble dry low, Cool iron
Source: JoAnn (link)

Use: Outer tunic, tabards, obi


Sew Classic Specialty Cotton Daphne Poly/Cotton Blend

Color: Papyrus
Width: 43 inches
Content: 65% polyester, 35% cotton
Care: Machine wash cool delicate, No chlorine bleach, Tumble dry low, Cool iron
Source: JoAnn

Use: Outer tunic lining, tabards interfacing


Sew Classics Bottom Weights Weavers Cloth

Color: Cornstalk
Width: 44 inches
Content: 55% polyester, 45% cotton
Care: Machine wash gentle cold, Non chlorine bleach, Tumble dry low, warm iron
Source: JoAnn

Use: Pants

Wednesday, July 23, 2014

Arix - Design

The design choice for Arix's costume is pretty straight forward. Jax asked for a Clone Wars Obi-Wan to go with his Clone Wars Anakin. Arix is four-years-old and has autism. I don't think he has an opinion on his costume other than he probably won't want to wear it.


Clone Wars Obi-Wan is much like Revenge of the Sith Obi-Wan. I anticipate it being fairly simple. I'm going to use a brown T-shirt for the inner tunic, and I think I'm going to forgo the robe. I might change my mind later. For now I figure why put so much effort into something that he doesn't have to have and doesn't want?

The parts for this costume are:
  • brown inner tunic (T-shirt)
  • dark khaki pants
  • cream tunic
  • cream tabards
  • cream obi
  • brown belt
  • brown boots/shoe covers

Tuesday, July 22, 2014

Jax - Tunic, Tabards & Obi

Today we are covering Jax's outer tunic, tabards and obi.

(click to enlarge)

Tunic

The pattern for the tunic is a mash-up of the tutorial by SithariRog on the Rebel Legion forums, Simplicity pattern 3935 and Jax's measurements. 


It really isn't as hard as it sounds, especially if you have done any pattern garment sewing. I used the pattern for things like the curves for the armseye and collar. I traced the parts I wanted from the pattern on tissue paper. Then I measured Jax and used that to draw the straight lines on my tissue paper pattern. After that it was just cut and sew.


For what I am calling the facing (the strip of fabric around the collar and the open edges in the front), I did the same way as the inner tunic. I cut two 4" wide strips on the bias and sewed them end-to-end so that I had one really long strip. I cut it on the bias since bias cut fabrics love curves. They like to bend and conform unlike straight cut strips of fabric. I pressed the strip in half with wrong sides together. I sewed the raw edge of the strip to the raw edge of the body of the tunic. Unlike the undertunic, I skipped the topstitching since the facing was not trying to flip down on its own.

I used SithariRog's method of making a "skirt" for the bottom half of the tunic instead of letting the whole thing open in the front like a robe. However, I put slits in the sideseams of the "skirt" to ensure that he could run.


The front stays closed with a sew-on snap. In the future I would plan and add the snaps before finishing the garment to reinforce them with interfacing and make them invisible.

Tabards

I went off of SithariRog's tutorial for this, just scaled it down to Jax's measurements. 

(click to enlarge)
I topstitched around the entire perimeter of each tabard with a 1/4" seam allowance. I used black heavy-duty thread. Be sure to use a large topstitch needle or leather needle (size 100+) if you intend to do this. Using a smaller needle in your machine will shred this heavy weight thread.

Tabard back ends sewn to belt.
I also added my own little modification. To keep the spacing right in the front and hold it together, I made a little belt from a scrap left over from the tunic, stabilized with interfacing. I sewed the tabards onto the strap and velcroed it in the back. This little belt is hidden by the obi. For the adult costumes I think I am going to use this method, but close it with snaps instead.

Obi

I sewed a big rectangle 5"x26" and put a strip of velcro on the back.


As I mentioned in the last post, I have since talked to members of the Rebel Legion and they recommended staying away from velcro. Apparently it doesn't hold up well at over long periods of time and is a huge hassle to wash.

What I learned:
  1. Plan snaps before sewing so that they are hidden.
  2. Snap tabards to tunic at shoulder seam near the collar.
  3. Measure twice, sew once. (Somehow the tunic top, above the skirt, was four inches too long! I had to shorten it. But on the bright side, I didn't cut off the excess. I sewed a hidden pleat at the waist line. If I let it out, it will grow with him.)
  4. Fit top half of tunic on person, then draw line where the skirt should attach or it won't lay right. Three pieces of fabric (left front top, right front top, and skirt front of tunic) do not like to play nice.
  5. Do not use velcro or fashion tape to hold things together. Opt for snaps, hook-and-loops, or stitching instead.

Monday, July 21, 2014

Jax - Inner Tunic & Pants

Here are the foundation pieces for Jax's costume. For fabric information, see this post. (Sorry about the bad lighting in the picture.)

Step one was taking good measurements of his length (from "neck bump" down), shoulders, chest, waist, hips, neck to shoulder, neck to fingertips, and shoulder to fingertips.


Pants

I started with the pants. I used the pattern Simplicity 3935 with no alterations. It turned out great except that I have the worst time getting the elastic for the waist band the right length. I always worry about it being too tight and make it too loose. This is something I need to work on. Anyway, I am also planning on adding stirrups later on to keep the pant cuff from coming out of his shoes.


Inner Tunic

The inner tunic took a little more work. I used the same pattern as a basis, but even the XS size is too large for Jax. I laid out the pattern pieces for the shirt front and started tracing, measuring and marking on tissue paper.

(click to enlarge)

I lined up the two pieces for the front sections, traced the armseye and angle for the side seam and shoulder seam. Then I referred to Jax's measurements and measured out the length of the side seam and shoulder. (Remember your seam allowances!) Next I traced the angle of the neck from the pattern, but redrew the lines until it looked how I thought it should go. A 6"x24" quilting ruler was very helpful in drawing those straight lines. Hopefully you can see from this picture how I drew and redrew the lines until it looked right.

I mostly used the back and sleeve patterns as is. The only adjustment was shortening the shoulder length so that it matched the front pattern, and shortening the sleeve to match Jax's measurements (with hem allowance).

I deviated from the pattern when adding what I am calling the facing (the strip of fabric around the collar and the open edges in the front). I cut two 4" wide strips on the bias and sewed them end-to-end so that I had one really long strip. I cut it on the bias since bias cut fabrics love curves. They like to bend and conform unlike straight cut strips of fabric. I pressed the strip in half with wrong sides together. I sewed the raw edge of the strip to the raw edge of the body of the tunic. I also topstitched along the back of the neck, between the shoulder seams, 1/8" below the seam between the tunic body and the facing to encourage the facing to stand up.

(click to enlarge)

I closed the front with a long strip of velcro. I have since talked to members of the Rebel Legion and they recommended staying away from velcro. Apparently it doesn't hold up well at over long periods of time and is a huge hassle to wash. In the future I would use snaps or buttons.

What I learned:
  1. Use snaps instead of velcro.
  2. Do not ignore others' advice about making a mock-up first. (Though I think it will take a long time for this lesson to sink in.)
  3. I need to learn to to get facing strips to lie flat.
  4. For children's costumes, use a crew neck T-shirt for the inner tunic instead of sewing one.
  5. I need to work on getting waistband elastic length just right so that it is nice and snug.

Saturday, July 19, 2014

Lightsaber - Hilt

As of today, my hilt is complete! (Scroll down for parts list.)


Most of the pieces screw together, but I did need a few tools to finish it off. Namely, the 4-40 button head screw for the activation box needs a 1/16" allen wrench, and the 8-32 socket head screw for the Covertec wheel needs a 9/64" allen wrench. Of course I could not find our set of allen wrenches. So off I went to Home Depot.

I purchased the SAE Short Arm Hex Key Set (10-Piece) for $4.97+tax.

SAE Short Arm Hex Key Set (10-Piece)
I purchased this set for three reasons. 1) This set included the 1/16" and 9/64" wrenches I needed. 2) It was only five bucks. 3) The short wrenches will fit easily in a pouch on my belt so I can carry them with me in case I ever need to tighten something while on the road. That third one was more of a bonus, really.

The other tool I needed was a pair of round nose jewelry pliers. These can be found at any craft store (or Walmart) on the beads aisle for less than $10.

(click for larger image)
I used these to get that little bugger of a C-clip in place to hold the insert in the pommel. I have read that they are a pain to get in. It was a little difficult and took a few tries, but I got it in place and I highly doubt I will ever attempt to take it out. It certainly is never coming out on its own. I can't imagine trying to get it in without these pliers.


Finally, you may have noticed that I ordered a hole to be drilled and tapped for my blade retention screw, but I did not order the screw. The 8-32 x .3" anodized thumb screw that I want is on back order. This isn't a big deal to me. I'll order it with my blade, which won't be for a while yet.

Overall I am very happy. I love how the main section of the hilt turned out with the warlock gray powder coat stripes, activation box and anti vandal switch. Although, I was hoping the sun gold powder coating on the pommel, choke and blade holder would be a metallic gold. It is more metallic mustard yellow. This is not a criticism of the product. It looks very nice, it just isn't quite what I was hoping for. May be one day I will order the same parts in black or something. That is the beauty of the modular hilt system. I can switch out parts as often as I like. :)


My parts list is as follows (copied from Lightsaber page):

Hilt (Use the MHS Builder to choose your main hilt pieces.)
Hilt style 3
MHS choke style 3
MPS pommel style 4
MHSV1 Blade Holder Style 12
MPS insert style 7
MPS clip (C-clip)
Activation box style 9
16mm Anti Vandal Short Momentary White Ring Switch
2.1mm Power Jack
Kill plug style 5 (color: none)
4-40 Button Head Screw
Machined button for Covertec clip (a.k.a. Covertec wheel)
8-32 x 1/4" socket head screw
Covertec clip

Services - Powder Coat (Use the MHS Builder to order the powder coating.)
Pommel powder coating (PM41) - Sun Gold
Choke powder coating (CH31) - Sun Gold
Blade Holder powder coating (B122) - Sun Gold
Main body powder coating (SH33) - Warlock Gray

Services - Drilling
Box 9,10, and 17 Mounting holes service
Drill & Tap Hole - 8-32, covertec clip
Drill & Tap Hole - 8-32, blade retention screw