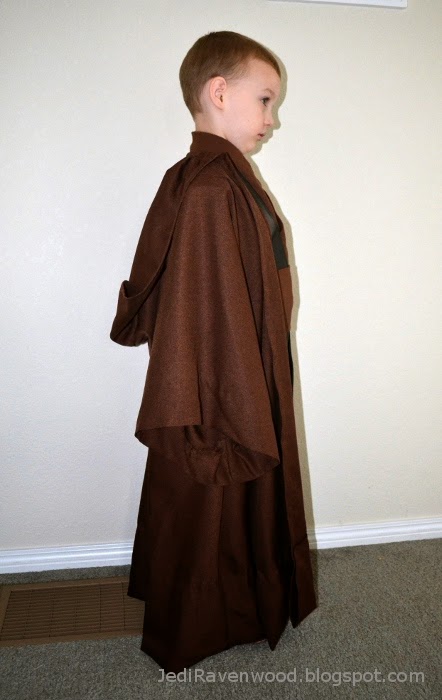
Behold! Jax's robe! (Imagine fanfare here.)
For the most part I followed
SithariRog's robe tutorial. I only messed up in a few ways, but we will get to that later.
I realized that the sleeves were short enough that I could cut the robe main body as one piece by folding the fabric in quarters. I did this (more on that later) and I basically had a Jedi robe shaped poncho that needed side seams.
I stitched up the sides with French seams. It looks nicer and the material I chose really likes to shred at the edges. French seams = no loose threads to cut off in the future.
Next I cut the hood. (It is too big. I need to find a good hood-to-body ratio.) In the tutorial it says to pleat the hood and robe. I'm all for pleats, but it was late and I was being impatient so I gathered the bottom edge of the hood and sewed it to the neck of the robe body.
I sewed a strip of fabric over the main body/hood seam to cover the raw edges as recommended in the tutorials. I don't think I did it quite right, probably because I did it all on my machine. No hand stitching. I'm going to have to think on this and research some more before trying it again.
Remember how the robe was like one big poncho? At this point I cut open the front of the robe. I used a 1/2" rolled hem to finish the front edge. I did it all in one seam--up the front on one side, around the hood, and down the front on the other side. Clean. Neat. Done.
I had
lots of material left over for the hems on the bottom edge and the sleeves. I decided to leave the excess material to let the robe out as Jax grows, instead of cutting it. Cutting would have been easier with those A-line curves, but it is done now and it's great.
A quick word on the hems for the sleeves and bottom edge.
Please, for the love of all that it good and beautiful in this world, use a blind hem stitch for hems on curves. It really isn't that hard once you know how to do it. Look it up on YouTube. Having a blind hem foot for your machine makes it just that much easier.
Now it is later. I realized that the sleeves were short enough that I could cut the robe main body as one piece by folding the fabric in quarters. That wasn't the problem. I didn't move my fold so as to leave the most amount of excess at the bottom of the material. It was late and I was not being patient. My bad. This was all fine and well for the body, but left me insufficient material for the hood. (Face palm.)
I ended up sewing two rectangles together to make a large enough piece for the hood. If I had just moved the main body pattern and the fold up instead of cutting from the exact center of the fabric, it would not have been a problem and I could have sewed the hood from one, beautiful, uninterrupted piece of fabric. Live and learn. Live and learn.
What I learned:
- Cut from the edge of the fabric, no matter how much easier it is to cut from the middle.
- I need to learn how to cover the main body/hood seam and make it look good on the outside of the robe.
- Find some equations or something to get the sizing right--particularly of the hood.